Showing posts with label sewing. Show all posts

Tuesday, October 08, 2013

How I construct a collar with a collar stand

Yeah, I know I've been MIA for a long time.  I should show you the hobbit costume I made, it turned out awesome and I won best of show at the state fair for it (I did really well at the state fair in general this year).  Anyway, I've been making some shirts, and I thought I would show you how I construct a collar with a collar stand:

First, interface BOTH sides of the collar stand, and the top collar. I'm using Fashion Sewing Supply's Pro Woven Fusible Light Crisp interfacing. 

Next, you are going to stitch the collar stand to the shirt, right sides together, with the shirt sandwiched in between. 

When you get to the shirt fronts, you want to have your needle right next to the plackets. This is where you will pivot to stitch the curve.

Roll the shirt out of the way and stitch the curve up to where the collar will attach.

Trim, clip, turn, and press. Your stand should look like this.

Construct your collar.  If you trim a scant 1/8" from the collar edges (not the neck edge), you'll get a nice roll on the collar when it's worn.

Stitch the collar to the stand, putting the undercollar next to the outside stand.

Trim your seam allowance on the collar stand, turn it under, and cover the stitching from attaching the collar.

Edgestitch all the way around the collar stand. I usually start and stop at a shoulder seam.

The finished collar!

Inside.

Outside.


Sunday, July 15, 2012

New Look 6136

I made a birthday dress for my niece. She'll be 2 in August, but I wanted to get this entered into the fair (drop off is tomorrow). This was so fun to make!
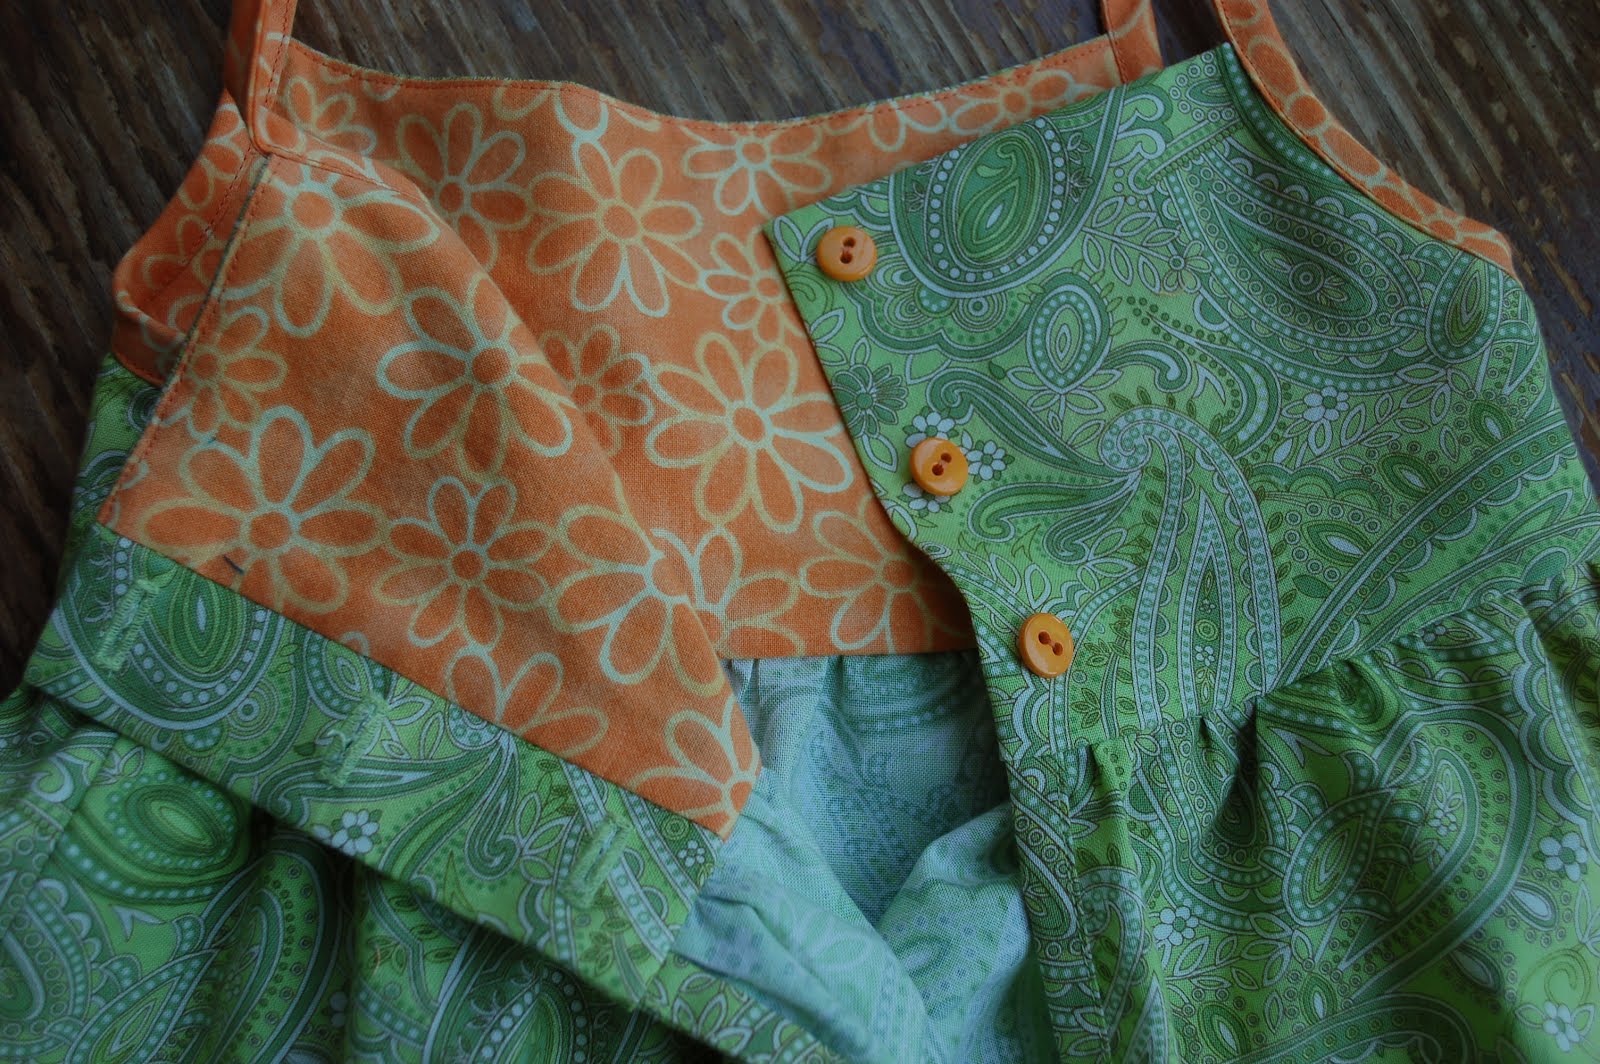
I fell in love with New Look 6136 when looking through the pattern books. I used an old Amy Butler print from the Ginger Bliss line, and found this great orange print at Joann Fabrics. The bow is removable for washing.

I constructed it a bit differently than the directions. The bodice is lined, per the pattern, but I completely enclosed all the seams, instead of having a raw edge at the waist. I also trimmed the back lining so that I could sew it to the back piece and then have the back flat (I don't think I'm making sense). Per the pattern, they wanted you to cut the fabric and lining using the exact same pattern pieces, stitch them RST at the neckline and back, then fold over the back section for the buttonholes. I didn't like that, so I did it differently.

The pattern calls for the bottom band to be interfaced, but I felt that would be too stiff, so I omitted it. To put the band on, I first did half the miters, like this. Then, once I knew those were stitched well, I did the rest of the band, with the other miters. If I tried to do the band all at once, I'm sure I would have messed up the miters that I would not be able to see.

(I don't know why this picture keeps uploading sideways.) Since the side seams are the only exposed seams, I just did a clean finish, instead of using my serger.

Three little buttons close up the back, and the cuteness just kills me!

Judging is on Thursday, so we'll see how I do. For children 4 and under there are 2 categories: Play Outfit, and Any Other Garment not Listed. This particular dress is going in the latter, or what I call the "everything but the kitchen sink" category.

Thursday, November 17, 2011

My Sewing Room: After

We worked solid for those four hours and check out my sewing room now!!!
We started in this corner, with the bookshelf. Right away, she made some boxes for me to put stuff in. We had Donate, Office/School supplies, To Go Through Later, Toys, and Half-Price books. At first it was hard to start, but once I got going, it was pretty easy. I decided that this room is a good place for the school/office supplies, so as I got areas cleared, she got that stuff put away. You can see, in the very corner, about 3 boxes that I need to go through. They have things like picture frames, music cds, and important papers I need to file. The grocery bags are either books that have already gone to Connor's classroom, or outgrown clothes that have been passed on to a friend's 4 year old son. The white box has school supplies, and is now next to the computer (which you will see below). The white basket tower thing now has 2 sections for projects, a section where I put things to put away later (and I'm not allowed to let it get full!), and some empty binders that I'll use when I file my patterns. I also plan to take another pass through the bookshelf and maybe weed out some more books. The drawers are completely clean and organized with office and school supplies.

Check out my clean floor under my ironing board! You can now also use that door. She gave me the idea of getting some bookshelves to put on either side of the bay window, and then using canvas totes (I'm thinking like Debbie's) or some sort of uniform containers to corral stuff. I see a trip to IKEA in the near future. I also have lots of ideas on my sewing room Pinterest board.

She also suggested painting the paneling a pale color. Other friends have suggested that also, as this room is pretty dark at night even with lights. Right now I'm leaning towards a warm grey or cool beige. I'll also be taking down that ugly curtain rod. I'm still not sure as to what type of window treatment to do. I want the window to stay open, because that looks right out onto Lake Michigan, and is beautiful. In the cabinets underneath is where all my fabric is stored.


My sewing table is clean! It's clean underneath too! That large mirror is going to go, either to a friend or a consignment shop. It's large (about 3x5 feet), and I have another mirror in the basement that I'd rather use, which is maybe 2x6 feet. More appropriate for fittings, as I'll hang it vertically, probably over by the built in bookcase. Then I'll figure a better location to hang the thread racks and my drawer thingy that's sitting on the table right now. This is as far as the organizer and I got, before we ran out of time.


So, my homework was to finish up my computer area....

....which I did on Monday night. I boxed up the old desktop, which wasn't functional, and put it in the basement. I'll get the data and pictures off of it after the holidays. I still need to clean off the clothes rack, though half of it will be gone tomorrow when some alterations get picked up.

I've been sewing in here every day since! It is so nice. I've also been a good girl, and cleaned up my mess each time I finish, so that I can keep the room looking good. Next I plan to have a friend come over and help me go through my fabric stash. I'm pretty sure I like and want everything that I have, but I would like another set of eyes, and I don't want to keep anything I don't have a plan for. Right now I have a few things in a Facebook album that I'm offering for sale or trade.

edited to add:  Gwen asked if I learned anything new.  No, I didn't.  Basically, she said everything needs to have a place (and first I need to ask myself does whatever I have even belong in this room or would it be better suited somewhere else), and everything needs to be put in its place.  If the boys want to bring some legos down here to play with, that's fine, but they need to bring them back up to their room when they are done.  I asked her why was this so hard for me to do alone, but easy when she was there, and she said it was because I didn't know her very well, and so we didn't sit and reminisce about stuff that I found, and I didn't stop and play with things I found, and she kept me focused.  She wouldn't let me delay a decision, and if I wasn't sure about something (do I donate it?  do I keep it?), she'd ask me to justify keeping stuff.  If I had good reasons, that was fine.  I hope to paint over the school winter break, so hopefully I can show you some more pictures in the new year.  

My Sewing Room: Before

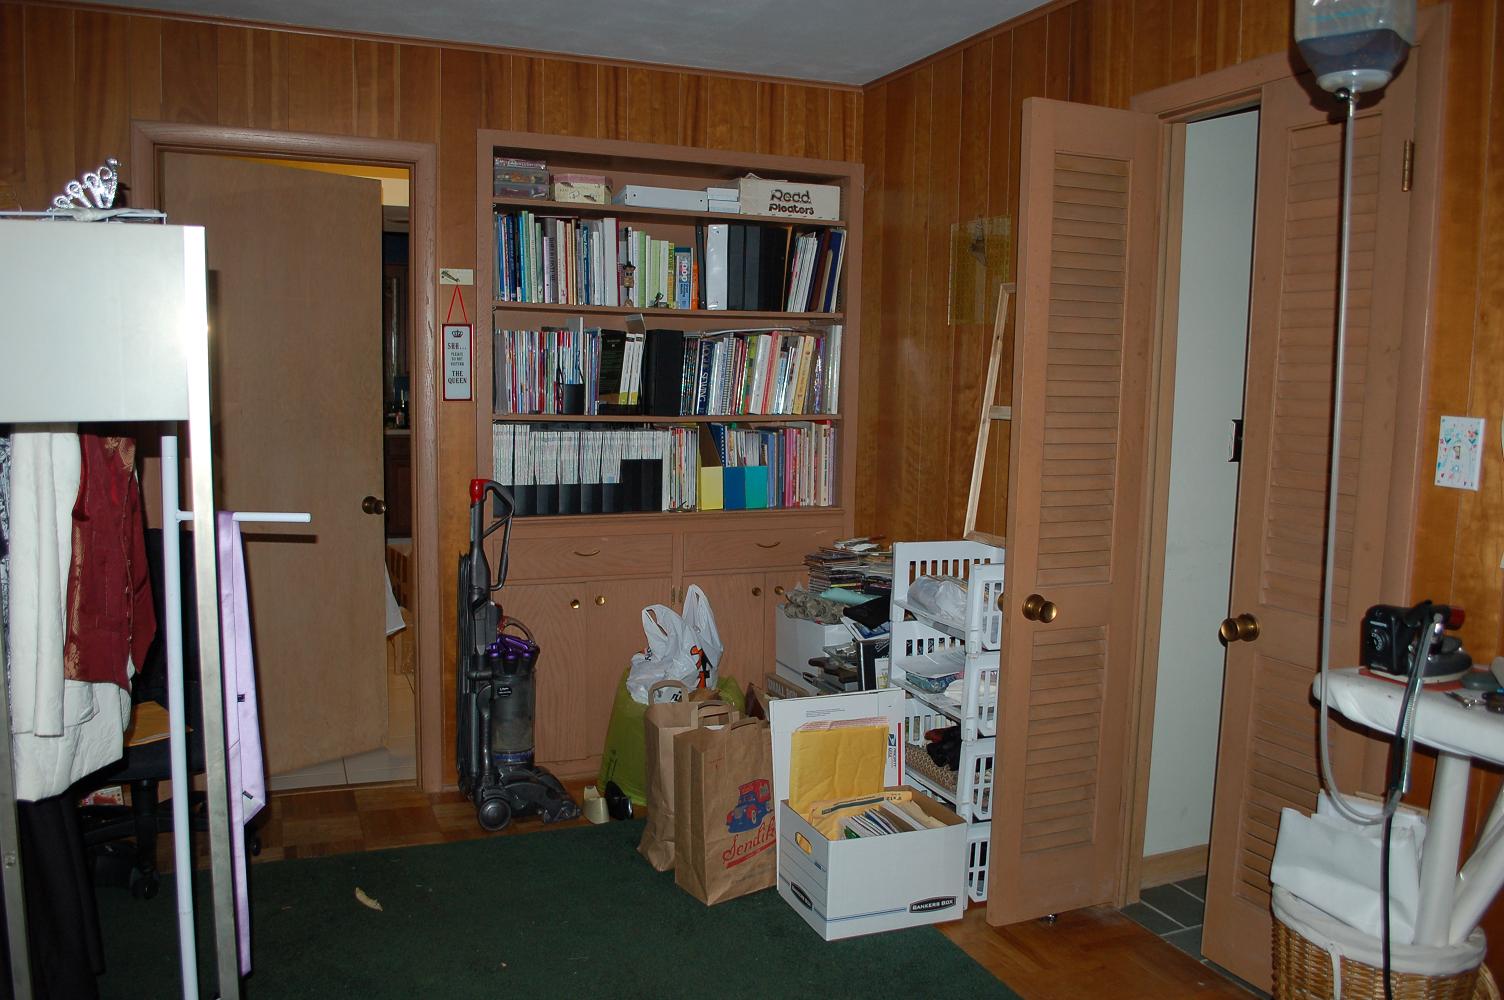
Back in May, I won a 4 hour session with an organizer at an auction. I knew I wanted her to help me get my sewing room in order, and last Saturday, we finally got together. I took some pictures of the disaster before we tackled it. It actually didn't look this bad when she got here, as I tried to do some stuff ahead of time. However, this room had become the "we don't know where to put it so we'll put it in here" room, and was really really out of control. Be warned, these pictures aren't pretty...
I know, right? Somehow, I still managed to work in here, though not very well, and the disaster here is probably why I haven't been sewing much. Next up, the after pictures!

Tuesday, July 26, 2011

More HotPatterns

I made 2 more HotPatterns last week. These were for the WI State Fair, and I cranked them out pretty fast. I thought garments were due for judging last Friday (the 22nd), but after checking online, realized they were due last Monday (the 18th), with judging on the 21st. Without those extra 4 days, I didn't get all my entries finished.

Anyway, I made the HP Riviera Cote D'Azur top:
which went together very fast. It's a great looking top. I want to try the dress also, though I'm pretty sure I'll stick with a solid for that, otherwise I fear it will look a lot like a caftan or muu-muu. Not really a look I'm going for right now at this point in my life.

I also made the HP Primavera dress:
which looks lovely, but in all honesty I don't know if it fits me. I'm pretty sure I should have at least done a FBA, but I was under a time constraint, so just made a straight 10. I figured if it didn't fit me, I'd be able to give it to someone, and sure enough, when I posted the picture on my Facebook page, Stacy S piped up that she'd take it if it didn't fit. :)

Both garments placed (4th and 3rd, respectively), as well as my HP Kimono Wrap dress (3rd) and Caleb's waistcoat (1st).

My food entries are due for judging tomorrow morning. I won't stay for that, so I'll have to wait until I go the fair to see those results. I'll be entering banana bread, a plate of scones (I plan do to whole wheat cinnamon ones), and strawberry jam.

Friday, May 20, 2011

Auction Bags

I made some bags for a silent auction/raffle at school:
l-r: Chelsea handbag, In Town bag, and Swing bag, all from Amy Butler. Also, all from stash! :)

At the last minute I decided to add a button closure to the In Town bag. Hopefully all 3 bags will do well and raise some money.

In other news, my husband and I went to the MDA Black-N-Blue Ball last Friday. I decided to go all badass and went with leather. It was pretty fun. I bid on a few things, but really really wanted one of them, and I won! Soon a personal organizer will be coming to my house and working on one area for 4 hours. That area will be my sewing room! Right now I'm working on de-cluttering and de-stashing, because I want all 4 hours focus on organizing.

Sunday, April 24, 2011

HP Wong-Singh-Jones Kimono Wrap Dress

Dudes, I have a new dress, and I LOVE it:
I made this a few days ago. It didn't take long at all, and went together beautifully. This is a straight size 10, although I made some minor changes, such as lengthening the skirt 4 inches, and making full patterns of the contrast bands (instead of cutting them on folds as per the pattern).

The ties are VERY long, and I ended up shortening them 18 inches (they are already wrapped around my waist twice). My original plan was to make the dress green and the contrast bands in the print, but I did not have enough of the green. HP suggests about 2 yards of 60" knit for the dress for sizes 6-8-10, but I ended up using 2.625 yards of the print. HP also suggests about .75 yards for the contrast bands, and again, I don't think that is possible. I used about 1.75-2 yds and had to piece the ties.

To apply the bands, I trimmed 1/8" off of one side (seam allowances are 3/8"), so that the edge would overhang the seamline by 1/4". Basically the same way I finish off a waistband. This keeps the bands nice and flat.

It's a great dress, I definitely need more of these in my closet. :)

Full review is here.

Thursday, June 10, 2010

Vogue 7488

Caleb's 8th grade promotion ceremony was last night, and here is his waistcoat. He picked Vogue 7488; I made a size M. I was to make a suit as well, but we decided it would be too hot to wear, plus probably wouldn't fit him come winter anyway. So, I'm going to take that wool and either make a suit for him for fall/winter, or I might find a topcoat pattern, as he wants a formal coat. (sometimes I think aliens have taken my real son)

Modifications I made were to cut the back out of the fashion fabric (the pattern calls for the back to be made from lining), I eliminated the back belt, and all four pockets are functional (top two are faux according to the pattern. I do my pockets like this). He was very pleased with how this turned out.

I don't really like finishing vests this way, preferring instead to stitch the shoulders and armholes completely by machine, turning through the lining side seam. However, there is no back collar on this (! I didn't like that part), so I had to do the armholes according to the directions, which meant hand stitching the back shoulder lining over the seam.

There is a nice split at the side seams.

The front inside has a hem facing. There is also a small pleat where the lining meets the facing -- it's not really needed, IMO. I'd eliminate that next time.

My boy is in high school now!

Full review for this pattern is here, at Pattern Review. I've entered it in the Sewing for Men contest.

Saturday, June 05, 2010

Single Welt Pockets

Four months since my last post. Sorry!

Caleb's 8th grade promotion ceremony is coming up, so I'm working on some clothes for him. While making the vest, I thought I'd show you how I do a single welt pocket.

First, I stitch around the opening, shortening my stitch length on the corners. You can see I bring the top part of the opening in about 1/4" on each side. This vest front is underlined with Texture Weft. If where your welt pocket is going isn't underlined, fuse a piece of interfacing on it to reinforce that area (I prefer knit fusible interfacing).

Make your welt, checking to be sure it is exactly the correct length for your opening (I was a bit off on this one). Baste the seamline. Place the seamline on the bottom stitching of your opening. Baste the welt down and then trim the seam allowance.

Put your pocket lining over the welt and stitch just the long edges of the pocket opening. Do this from the wrong side of your garment, so you can see the stitching that you did in step one. Stitch right on top of your previous stitching, starting and stopping exactly as you did before.

Cut through the pocket lining and opening, clipping just the garment diagonally into the corners. See how I stopped and started exactly on my previous stitching?

Turn and press the pocket to the inside. I don't press the triangles to the wrong side. It makes a smoother pocket, they are bias and won't fray, and no one is going to see them anyway.

Edgestitch the welts down, and you have a finished welt pocket! For this pocket, I was a bit off on my welt length and if you look on the right side, you can see a bit of my original pocket opening stitching. The damask hides a lot, and yes I know, I am being very picky. :)

Tuesday, June 09, 2009

Graduation Dress

I've been working on an eighth grade graduation dress for the daughter of a friend. They asked me back in February if I would be able to make one, and how much. I said 'of course!' (I mean, come on! I have all boys. I leapt at the chance to make a girly dress!), and said I do like the barter system. :) It's win-win -- her daughter gets a lovely, one-of-a-kind dress, I get some babysitting, or meals, or housework....I haven't decided yet.

Anyway, here's the dress. She brought me a magazine photo of a dress they liked, and we started with Vogue 2481. I flared the skirt and added straps. C is pretty much a perfect pattern size 8, so I did virtually no adjustments to the muslin I made. She has that perfect 14 year old figure, with the willowy waist. Ms. Belinda does not have the perfect 14 year old figure (and definitely no willowy waist), so I pinned the dress onto her as best I could.

The dress has an inner foundation, which I think is going to be great for C. The foundation keeps the dress secure and held in place, so she shouldn't feel the need to hike up on it all the time. Calvin and I had his gymnastics banquet the weekend before last, and a lot of the girls were wearing strapless dresses and constantly pulling on them. Not a good look! For the foundation, I used muslin, and cut each piece twice. Then I layered the pieces, stitched the channels for the boning (I used rigilene), and constructed the foundation.

I took care to match the pleats on the left side seam. The fabric was purchased at Joanns. They fell in love with it, and bought the whole bolt (only 2.5 yards), and thankfully it was enough. It's a polyester, but it feels really nice and is a very good imitation silk. I prewashed everything, and underlined the dress with white lining.

We lined the dress in pink, because isn't it fun to have a pretty lining? Besides, white is so sheer, you'd see all the seams through it. I prickstitch my linings (instead of slipstitching)down to the zipper to prevent them from rolling and getting caught in the slide.

To finish the bottom for the hem, I did a hong kong finish. 'Cause it's pretty. :) Graduation is tomorrow, I hope C loves it as much as I enjoyed making it.

(btw -- the boys wear suit jackets. I think Caleb might need a cool stylish suit jacket next year, no?)