Last week I finished the triangle quilt for the church silent auction. I cranked this baby out in 2 weeks!
 Here's the finished quilt. It's about 51" x 60", perfect for napping under. :)
 Now, a crash course in how I made this quilt:
 First, I had to cut out all my triangles. I did this during one of Calvin's gymnastics practices (3 hours of mostly uninterrupted time).
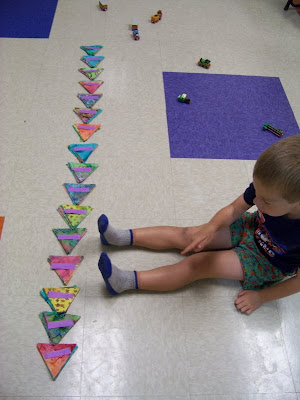
 Since I wanted the various FQ (fat quarter) triangles to be randomly placed, I laid the whole thing out. I did this at a different gymnastics practice, since there is a nice big floor to work on. By laying it out, I was able to make sure the various colors were nicely scattered.
 Once I liked the layout, I then layered each row from left to right (meaning, I took the left-most triangle and put it on top of the next one, then those two on top of the next one, etc., etc.). I labeled each row.
 Sixteen rows ready for pieceing! Connor counted them to make sure I had them all. :)
 Time to put the rows together! I put a FQ triangle with a background triangle, in pairs. I chain piece, then at the ironing board I clip them apart, keeping them in order. Then I put pairs together to make bigger pairs, repeat until....
 .... I have one long strip. I like to work a quilt from the bottom up, so this is row 16.
 Once I finish a row, I add it to the rest of the rows. Here are rows 14-16.
 The quilt top is pieced and borders are on. Ready for quilting!
 To layer the quilt, I put my backing together (it has one seam), then taped it to the floor (at yet another practice -- love that big floor at the gym), stretching it quite taut. Then the batting (Warm and White) was laid down and smoothed out. Lastly, the quilt top was put on, and the whole thing was safety pinned together.
  I quilted a squiggly line down the diagonal sides of the triangles, making a diamond pattern. I stitched in the ditch around the border seam.
 The borders got quilted with a meandering stitch.
  After the quilting is all done, it's time for the binding. I wanted a 1/2" binding, so I cut my bias strips 3.25" wide (6 x the finished binding width + 1/4"), folded in half, and stitched at a scant 1/2".
 Then wrap the binding around to the back and slip stitch into place (handwork that was mostly done at another practice. I get a lot done sitting at the gym).
 After a trip through the washer and dryer, the quilt is finished!
(that's my peach tree in the background -- doesn't it look great? There will be a post about it coming soon)


