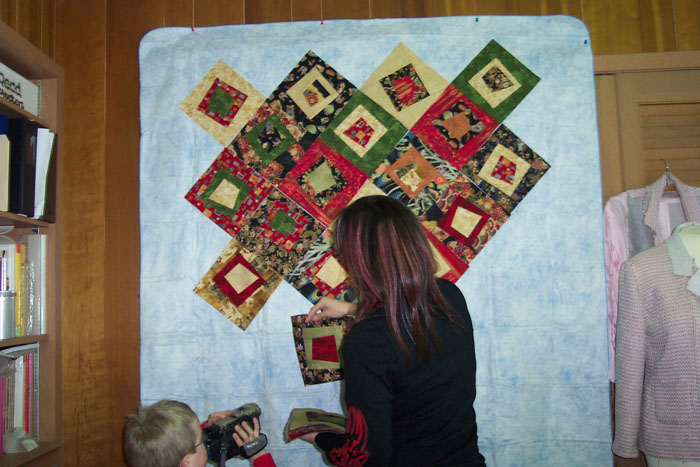
 I finished my quilt blocks (needed 39 total), and here I'm laying them out on my makeshift design wall. Have you ever read about creating a design wall? Most of the time it involves wood or foamcore, covered in flannel. Well, this one is much cheaper and more portable. It consists of a vinyl tablecloth pinned to my wall with thumbtacks, fuzzy side out. The tablecloth cost about $2, and is easy to put up and take down. If I didn't want to put holes in the paneling (eventually I plan to tear it down, so that's why I don't care about holes), I could make a sleeve in the top for a rod to go through, and hang it that way.
The quilt blocks stick nicely to the fuzzy surface, I can rearrange and step back and see the whole quilt easily, and when the time comes for stitching the blocks together, I'll just take a row down, stitch it together, and then stick it back up. I won't have to think too much about which block is getting stitched to which. Also, a design wall is in no way limited to only quilting. If I was making a garment, I might use a design wall to try out trims, combine fabrics, test different techniques, anything new I wanted to try and let mull about for a while before committing.
 Here is the final quilt layout. My setting triangles aren't cut yet, but will be purple. DH doesn't think that's going to look so great, but I like it, so there! :)
(as always, click on any picture to see it full size)
(Calvin has recently discovered how to use the video camera, so now he 'videos' everything all the time. It's quite fun to watch his movies, but the commentary is even better!)


1 comment:
Your quilt is going to be gorgeous! I had never heard of using the back of a vinyl table cloth before, much cheaper than using felt (which is all that I knew of). I can't wait to see it finished.
Post a Comment